Monday, February 11, 2013

The Anatomy of Valentine's Day

Just a fun post with a few of the best anatomical gifts for Valentine's Day!

My fire scale anatomical hearts are so popular, that I have yet to keep any in stock in my Etsy store! I just shipped this large order for a staff of heart surgeons today!! This is easily becoming my favorite pendant ever!


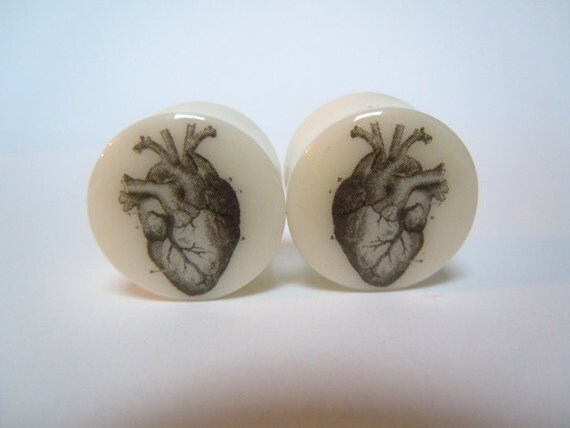
The Gauge Queen's anatomical heart white bone organic plugs! (See them here!)  I may still purchase these for myself for Valentine's Day.  They are conveniently just my size and I need to replace some earrings that were lost to the ocean during my Costa Rica trip.  :-)


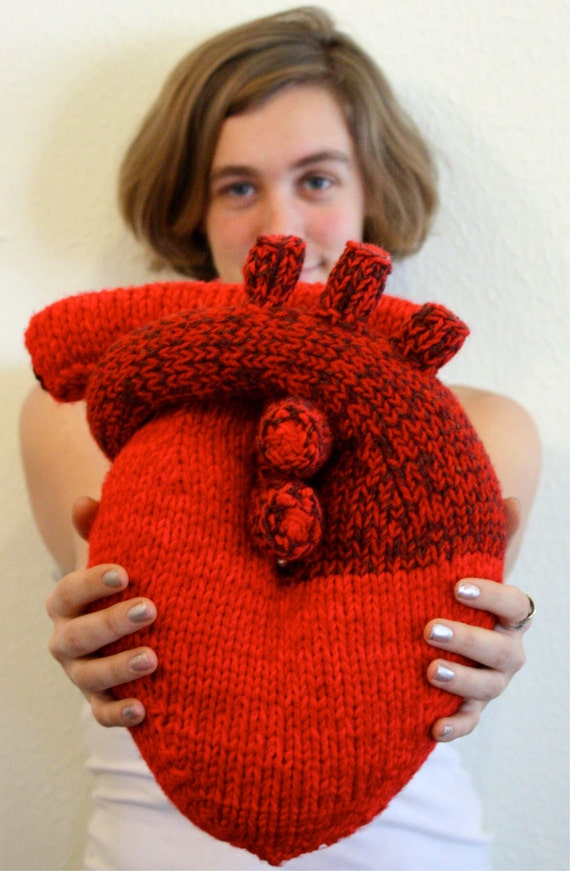
The Teary Seal's Anatomical "I give you my heart" pillow!  Who wouldn't want to cuddle up with this!?!   I just love, love, love it!!

Anatomical Love Heart Macarons...EYHO Valentines 2013.  By Miss Insomnia Tulip. YUM!!


Tuesday, January 22, 2013

Anatomical Awesomeness!

Just wanted to show off a few more new items in the store!  I'm going on vacation this week, so my store will still be open, but anything purchased will not be shipped out until I return on Feb 5.  I will be putting a vacation note in every listing just in case.

Copper, stamped.  Very fun and perfect for your sweetheart on Valentine's Day!

Copper, antiqued polish finish.  I really like this guy!


Copper, fire scale patina.  I absolutely love this one!  The fire scale is unique and different every single time!

Copper, polished finish.  I think this is my favorite in the Organ Chatter series!  It has great movement and fills the shape perfectly! 


Friday, January 18, 2013

BREATHE - Anatomical lungs pendant

Introducing the newest pendant in the Organ Chatter series.....

BREATHE.  Anatomical lungs!
 

This pendant measures about 1.25 inches across and 1.5 inches long. The additional dark lungs are also made from copper and finished with a solid liver of sulfur patina.  The top portion has an antiqued finish, also with liver of sulfur.

Which do you like best?  With the additional dark lungs behind (both hung on a jump ring) or just the single pendant itself?

Perfecting a few things and then it will be available in my Etsy shop soon!!

Tuesday, January 15, 2013

Anatomical Jewelry - IT'S POPULAR!

Spotted this anatomical jewelry advertisement on the Belmont train platform in Chicago this week!  First one in print that I've personally seen!   http://peggyskemp.com


I've seen Peggy Skemp's work flooding pinterest and other blogs I follow, so it's not surprising to see this advertisement!  It's exciting to know that the genre of creations that I also make, is really starting to gain popularity!! Now, to figure out how to get my anatomical jewelry on a billboard...  :-)


Also, I am restocking my Etsy store with the Organ Chatter pendants.  I got a lot of great feedback about them, with more new ideas than I can process at once!!  I will have one new pendant listed with this batch, but it will remain a secret until later this week!!  I love when a new idea actually becomes a physical creation!!


Monday, December 17, 2012

New Anatomical Jewelry series!

So my Etsy shop Anatomical Element (http://anatomicalelement.etsy.com) has been doing really well!  I've created a few new SMALLER versions of my original pieces and am surprised with how well they turned out!  I am getting much better at sawing fine details - now to improve my bezel setting!

Anyhoo, I just wanted to introduce a new series that I've been developing.  It's called Organ Chatter! It's a series of anatomical pendants featuring organs with specific words - like a liver that says Cheers!  Or a heart that says LOVE.  They will be available in my etsy shop soon!  Right now there's only one of each, but after the holidays I will be back taking orders and creating more!

Check it out! 


I've also played around with creating belt buckles.  This is my very first creation and I will have to end up making my own buckle instead of purchasing one, in order to make it secure.  But, it's a start!  Will hopefully offer more of these on Etsy as well!


And here's a few more fun images because it's Monday and we all need a pick-me-up on Mondays.
 I keep making things smaller!  This weekend I created my largest skull (belt buckle above) and my smallest (quarter size below).  Loving this!


This is available on Etsy right now!  
 

Saturday, October 20, 2012

Jewelry Chronicles: Wax & Casting

Another jewelry edition!  I decided to blog about this process in case I want to revisit it as a resource in the future.  All these notes are in my sketchbook, but it's helpful to pair them with the reference photos I took as well. So, here is my first experience with the lost wax casting process for jewelry!

Soft Wax & Sheet Wax
We were introduced to soft wax and sheet wax.  Extremely pliable.  Use of an alcohol lamp to heat up the tools allows you to add or take away wax to your sculpture, as well as connect pieces of wax together.  There is also soft wax wire that can be twisted or heated up on the ends to create drops or balls on your sculpture.


 Carving Wax
Carving wax is what we used to create our first ring sculptures.  There are 3 types: hard (green), medium (purple) and soft (blue). The soft wax is better for fine detail.  Using a twisted metal saw blade, we cut blanks from a wax ring tube.  Using a gauge and divider, the blank is measured and scribed to mark where your middle and carving spots will be.  It's like making a map for your sculpture.

Finishing
Any textures you have on the wax will appear in the metal.  So sanding and smoothing are important if you want a clean look.  The best thing to use to smooth is old pantyhose or nylons.  They burnish the wax and you are able to see spots that might need more sanding.

Sprue & Weight
A sprue is a channel for the metal to flow into the wax sculpture.  It's created out of wax and attached to the sculpture at an angle to reduce air bubbles.   Once the sprue is attached to your sculpture, you need to weigh your wax to figure out how much metal you need.  Luckily, the calculation is fairly simple.  Weight of wax in grams x 11 (specific gravity of silver) x 1.2 (an extra 20%) = The amount of silver in grams that you need.


Investment
Attach your sprue to the base of the flask with brown wax.  Make a tootsie roll shape and stuff brown wax into base hole.  Create a hole for the sprue in brown wax, then build up with wax and melt together.  Next coat all of the wax with a debubble-izer solution and let it dry completely for about a half hour. 
Mix investment plaster: sift slowly as powder dissolves itself and pour into flask when thick. You have 9 minutes TOTAL to mix and pour.   Put flask on vibrating wheel and tap the sides to eliminate air bubbles.  Let this set for 10 minutes, then scrape off the excess plaster on top.  Remove the bottom slowly and store in a plastic bag.


Casting
When ready to cast, put your flask in an oven or kiln to melt out the wax.  A mold is left by your investment.  Casting is done using a centrifugal or spin casting method.  The spin caster is wound up and held in place with a pin.  Then pre-heat the crucible so it is ready for the metal.  Pour your silver metal into the crucible and heat up until the metal is molten.  The flask is placed in the cradle and with the bottom facing the crucible so the metal will flow into the flask.  Re-heat your metal until molten again.  Drop the pin that is holding the device still, then let go, remove heat and allow it to spin and cool until it stops.


Remove your flask and allow it to cool for about 10 minutes.  Then quench it in water to remove the investment.  Find your metal and clean off the excess investment.


Clean up and Polishing
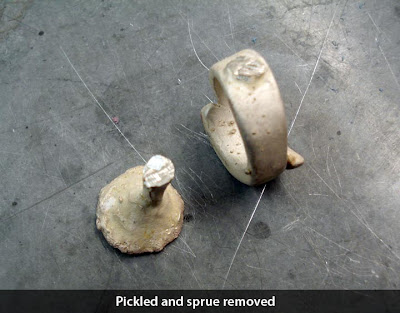
Put your metal in a pickle pot to clean off the dark oxidation.  Then remove your sprue by sawing and begin the sanding and polishing clean up of your piece! 


Tuesday, September 4, 2012

Success & motivation

Hooray!!  http://anatomicalelement.etsy.com is a SUCCESS!!  
I'm very excited that I have sold 3 items already!  This success is just driving my motivation through the roof!! I have been sketching and writing out ideas all day!!

It's fun to package up the pieces and send them off!  Here's a quick photo of my very first sale all ready to go!  I include a handwritten thank-you card in each package, with my business card and care instructions (if necessary).  I might start including care instructions with all of my pieces.

Like the skull ribbon?!   I might reserve this for anatomical pieces only, as it might be too Halloween-y for some folks.


And I have my first commissioned challenge - a skull belt buckle using my skull pendant as a basis!  I ordered a blank belt buckle and I have a bunch of ideas swimming around in my head!  Can't wait for it to arrive so I can start creating!!

I will be listing the remaining items that I have finished this week.  I have some rings that I need to figure out what size they are before I list them.  Need to buy a ring mandrel with sizes.

What do you all think of the store and my pieces?  Anything you'd like to see??   
Any challenges!?!?!